 |
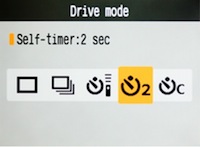
2-sec delay prevents
camera shake. |
Settings:
Before setting anything else, it's definitely worth changing your drive mode to a 2-second timer delay. This means the camera will take the photo 2 seconds after the shutter button is pressed. Believe it or not, it's possible to get 'camera shake' (or rather 'tripod shake' in this instance) simply by rocking the tripod when pressing the shutter button. A 2-second delay allows enough time for the tripod to return to a completely stationary position before the shot is taken, removing camera shake. An alternative is to use a remote timer so that the camera is not being touched when a photo is taken.
As with all photos, we're firstly aiming for correct exposure. So depending how bright or dark you want your photo, set your Exposure compensation (+/-) accordingly. For the vast majority of shooting, keeping it at 0 will give you what you want - mid brightness across the whole image. You can always change this on the go if you find your photos are coming out a little too dark or too bright on your camera's LCD screen.
Now we have to ensure we get a long shutter speed: There are a couple of ways to do this, remembering that Aperture values (f/stops) and shutter speed values are always paired. In the world of digital photography we therefore have the option of choosing to control one of these variables (either our Aperture or our shutter speed) and the camera will pick the other half of the pair for us.
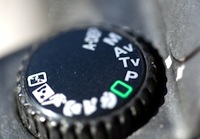 |
| Using Tv (or S) mode. |
Using Tv (or S) mode to select a shutter speed:
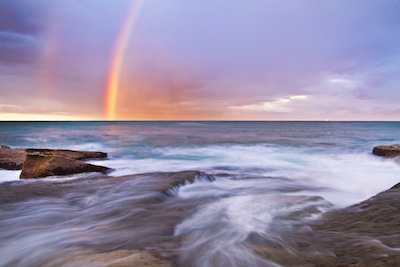
When it comes to achieving a long shutter speed one option is to use Tv mode (for canon cameras or 'S' mode if you're using another model of camera) and scroll the value as far as you can before the Aperture value (the f/number automatically selected by the camera) begins to blink. When in Tv (or S) mode, just be aware of these blinking aperture values (f/numbers). The camera will still enable you to take the photo, but if there are blinking numbers it is trying to warn you that the photo you're about to take will not turn out with the exposure you've asked for. So assuming you're Aperture isn't blinking at you, you can select whatever length of shutter speed you would like. For something like a waterfall, even just 1 second (will look like 1" on your LCD) is long enough to smooth that beautiful cascading motion. When taking photos of waves, usually something much longer is required to smooth the surface of the water - sometimes 30 seconds (will look like 30" on your LCD). It depends a little bit on what shot you're trying to construct and how much movement you wish to capture. It will also depend on how much light is around. In low lighting conditions you'll be able to access longer shutter speeds before the f/number starts blinking at you. Use Tv mode if you're after a specific shutter speed.
You'll likely notice that as you scroll to longer and longer shutter speeds, the f/number (being picked by the camera) will be getting larger to compensate. The larger the f/number the larger the depth of field in your photo (amount of the photo that's sharp). Depth of field is something to be mindful of, which is why I prefer to actually control my Aperture value instead...
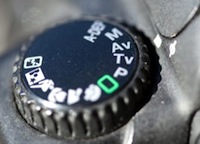 |
| Using Av (or A) mode. |
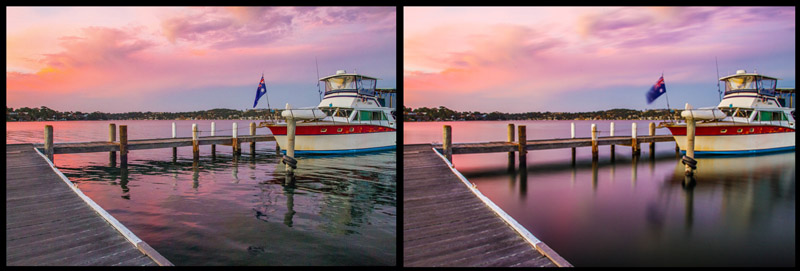
Using Av (or A) mode to select your Aperture (and control your depth of field):
Aperture controls the depth of field in the photo. Therefore, personally, this is more often than not the variable I wish to control, particularly as in the case of coastal exposures (or most sorts of landscape shots) I want to ensure I have a big depth of field so that both the foreground and background are in focus. F/numbers relate to depth of field. If I use a SMALL f/number I'm going to get a SMALL depth of field. If I use a BIG f/number I'm going to get a BIG depth of field. So for a landscape shot I want to select a BIG f/number.
How does that relate to shutter speed? Well, because apertures and shutter speeds are paired, when we use a BIG f/number (which is actually a very small hole, making light trickle through the lens) the camera automatically requires the use of a long shutter speed to achieve 'correct' exposure. When the biggest f/number available to our lens is selected, the camera will automatically give us the longest shutter speed available in the lighting circumstances. In lower lighting conditions - like just before sunrise, just after sunset or in a rainforest - this usually means we can achieve shutter speeds long enough to blur motion.
It is worth keeping an eye out for any blinking shutter speeds. Just like in Tv mode when the f/number blinks if we've scrolled too far for the camera to deal with, in Av mode the shutter speed will be the variable to blink. However, given that the longest photo a camera can take is 30 seconds (30"), unless it's particularly low light it's unlikely you'll ever reach this limit. Therefore, you're a little bit safer simply selecting the biggest f/number available in Av mode as it's unlikely you'll reach the camera's shutter speed limit. Normally the challenge is achieving a long enough shutter speed in brighter lighting conditions. This is where setting the ISO can help.
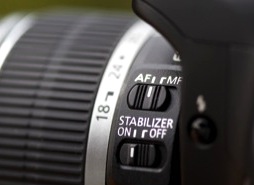 |
| Use AF to focus, then lock into MF |
Using ISO to access slower shutter speeds: ISO is how sensitive the camera is to light. It is NOT a brightness control. It's difficult to achieve long shutter speeds if the camera is set to a high ISO. That's because a high ISO means that the camera is very sensitive to light and therefore won't need much time at all to collect the required amount of light for the photo. Since we're trying to achieve long shutter speeds in this tutorial, to enable the blurring of motion, we need the camera to have a low-sensitivity to light. Having a LOW ISO will require the camera to take a longer time to collect the available light, which will in turn achieve movement blur due to the slow shutter speed. For long exposure exercises I generally set my ISO as low as possible (on my camera this is 100).
Autofocus:
Your camera's autofocus is much quicker and more accurate than trying to use your eye and manually focus. Autofocus on something that's important in the photo but that is still and stationary, such as a rock, log or pier. If the scene is too dark to autofocus, try using a torch to light it up. Once the camera has found an autofocus, you can 'lock' this focus distance by flicking your lens over to Manual Focus (MF). Assuming you do not move the camera, the focus distance won't change.