A bit about Post Production.
How you tweak your photos in post-production is a matter of personal preference, however when shooting lightning, there are some common tweaks that you might want to be aware of.
Should I shoot in RAW?
Shooting in RAW isn't essential, but if you're proficient in post production, it does give you more ability and depth of control when tweaking, particularly noticeable in shadows and highlights. Just be aware that if you choose to shoot in RAW, you will NEED to process the file and export it as an image (jpg or similar) if you wish to print it, share it on Facebook or email it to a friend. Check out our
tutorial on RAW vs JPG to find out if shooting in RAW is right for you!
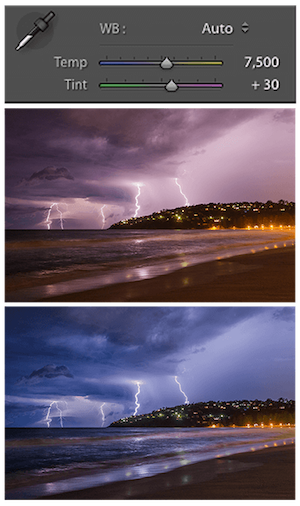
White Balance ('temperature' and 'tint'):
White balance (a mix of the 'temperature' and 'tint') determines how colours appear in your photo. Lightning can sometimes cause white balance to behave a little erratically. This is because lightning is a random (and very bright) bolt of light of a unique colour, which your camera wasn't expecting when it made its colour calculations. The resulting photo can often look too pink or purple. This is easily corrected by adjusting your white balance (temperature and tint) in post processing. Just slide these around until you achieve the result you're after. As a general rule of thumb, 'cooler' (bluer) lightning shots (less warm tones such as yellow and orange) often look more eye-catching. Selecting 'Tungsten' on your white balance in your camera can help to give colder-coloured photos.
Highlights and Contrast:
It's also worth adjusting your contrast and highlights to help the definition of the bolt stand out against the dark sky. Don't go overboard, but a little boost in contrast and a little drop in the highlights can often make for a better photo.
Try 'stacking' your images:
Have you seen those photos with several lightning strikes in the one image? It's very unlikely all these strikes were captured in one, 30-second exposure. Instead, those photos are usually several (nearly) identical shots, stacked on top of each other.
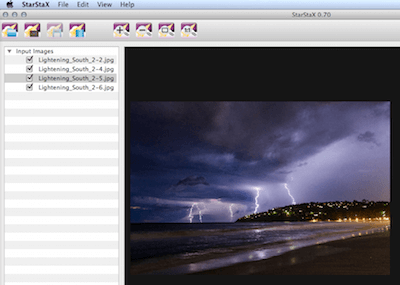
If you keep your tripod in the same position and take several photos, you will capture several identical shots where nothing in your scene changes except for the lightning. By stacking these (nearly) identical images on top of each other in post production, each new lightning strike is simply added to the photo. The result is a stacked photo with lots of strikes. We recommend using a program such as '
Star Stax' which does this stacking for you automatically. It's free, and actually designed for stacking photos of stars into a 'star trail' (we have a great tutorial on
star trail photography), however it works exactly the same way with lightning (or fireworks - see our
how to photograph fireworks tutorial!)
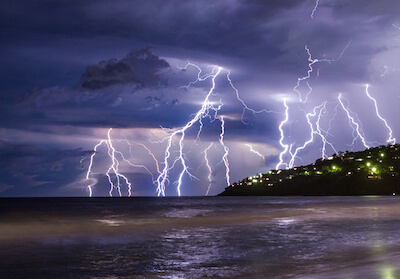
Here's an example of 3 lightning photos, stacked together - they all had the same background scene, just featuring different bolts of lightning.

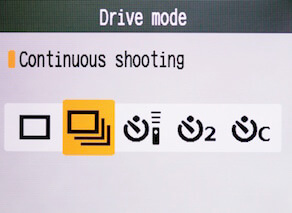 Once you're happy with how your photos are turning out, a safe way to take lightning shots is to set your drive mode to continuous shooting and then plug in a cable release. By locking your cable release button, you can then retreat to the safety of your car or shelter and your camera will just keep taking photo... after photo... after photo... after photo, until you go and collect your camera again just before it gets rained on. That way you won't miss any lightning strikes and you won't have to stand out in the open!